When you’re reducing an architectural blueprint say, from full-size construction drawings to a 1:50 scale for client presentation you’re not just shrinking lines. You’re applying precise mathematical transformations that preserve proportions, angles, and spatial relationships. That’s where the Advanced Scale Transformations worksheet modeling architectural blueprint reduction comes in: it’s a focused tool for practicing how scaling interacts with shear, stretch, and coordinate shifts in real-world drafting contexts.
What does “advanced scale transformations worksheet modeling architectural blueprint reduction” actually mean?
It’s a practice sheet designed around geometric scaling operations used when converting architectural plans between scales not just uniform resizing, but cases where walls shift slightly due to perspective adjustments, site constraints require horizontal compression, or floor plans need vertical exaggeration for clarity. Unlike basic scale factor multiplication (e.g., “multiply all dimensions by 0.02 for 1:50”), these worksheets include non-uniform scaling, translation offsets, and controlled distortion like compressing a façade drawing horizontally to fit a narrow page while keeping window heights accurate.
When do architects, drafters, or students use this kind of worksheet?
You’ll reach for it when preparing scaled-down presentation boards, adapting historic blueprints to modern CAD layers, or checking how structural annotations hold up across different output sizes. For example: a student might use the worksheet to simulate how a 1:20 detail drawing changes when printed at 1:40 on A3 paper accounting for both linear reduction and minor alignment drift caused by printer margins. It’s also relevant when integrating hand-drawn sketches into digital workflows where scale inconsistencies cause misaligned layers.
How is this different from regular scale practice sheets?
Standard scale worksheets usually ask “If 1 cm = 1 m, what’s the length of the hallway?” This one asks: “Given a shear transformation matrix that compresses x-coordinates by 15% while preserving y-lengths, redraw the stairwell footprint and verify door swing clearance remains within code.” That level of specificity appears in the worksheet focused on shear and stretch transformations, which builds directly on blueprint reduction scenarios.
What mistakes trip people up most?
- Assuming all scale reductions are uniform real blueprints often need selective stretching (e.g., elongating ceiling height labels for readability while keeping wall thicknesses true to scale).
- Forgetting translation steps: scaling changes origin points, so moving the drawing back into frame requires recalculating offsets not just resizing.
- Applying transformations in the wrong order (e.g., rotating before scaling can skew proportions; scaling before translating can shift elements off-page).
What helps make this easier in practice?
Start with a grid overlay on your original blueprint preferably a modular grid matching common architectural units (like 300 mm or 12 inches). Then map each transformation step onto that grid: first scale, then shear, then translate. Use consistent reference points (e.g., always anchor to the lower-left corner of the main entrance) so measurements stay traceable. If you’re working with scientific graph scaling too, the graph enlargement worksheet reinforces how axis-specific scaling behaves useful when replotting HVAC load graphs alongside floor plans.
Where does vector field scaling fit in?
Less obvious but important when modeling airflow, lighting gradients, or structural stress across a reduced blueprint. You’re not just resizing shapes; you’re adjusting directional data tied to geometry. For instance, a wind-load vector drawn at full scale must shorten and rotate correctly when the building outline shrinks non-uniformly. The vector field worksheet walks through those calculations step-by-step, using actual architectural examples like cantilevered roof loads.
What should you do next?
Print one version of your current blueprint at two different scales (e.g., 1:100 and 1:200), then try redrawing key elements door swings, stair treads, window headers using only the transformations covered in the worksheet. Check alignment against the grid, verify clearances with a ruler, and note where assumptions broke down. That hands-on test reveals exactly which transformation type needs more practice and which shortcuts introduced error.
 Mastering Advanced Scale Transformations for Data Graphs
 Advanced Worksheet: Non-Integer Scale Transformations
 Applying Shear and Stretch Transformations Worksheet
 Mastering Scale Factor in High School Geometry
 Solving Scale Factor Word Problems Worksheet
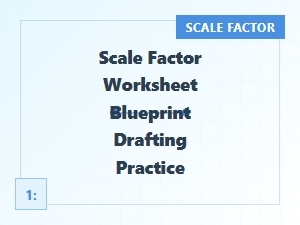 Blueprint Drafting Practice with Real-World Scale Factors